By default iTunes or Finder makes iOS device backups to a deeply buried folder on the internal drive. There is no specific setting that you can enable and choose a different location. These backups can run into multiple gigabytes. Thus, for better storage management, you may wish to change your iPhone backup location on your Mac or PC. Let me show you how you can move the default iOS backup location.
- Change iPhone Backup Location on Mac Running macOS Catalina or Later
- Restore iPhone Backup Folder to its Original Location on Mac
- Change iTunes Backup location Using iPhone Backup Extractor
- Already Changed iTunes Backup Location But Unable to see the Backup?
- How to Change iTunes iOS Backup Location on Windows PC
Change iPhone Backup Location on Mac Running macOS Catalina or Later
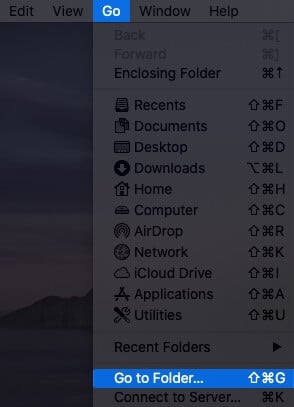
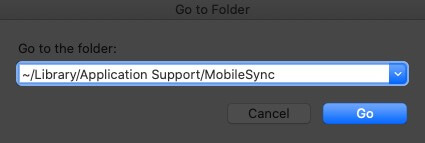
- From the top menu bar, click on Go → Go to Folder… Type or copy-paste this exact address ~/Library/Application Support/MobileSync.
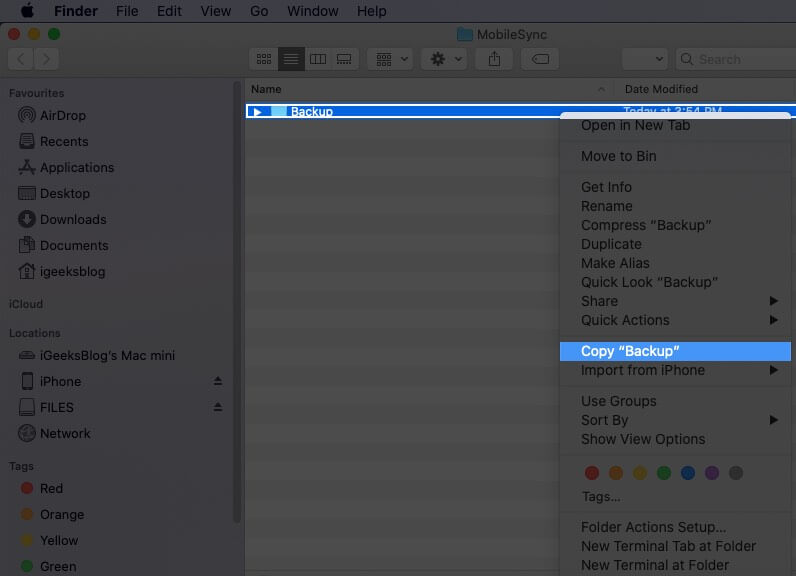
- You are now at the location where your Mac makes the backups by default. Right-click on the Backup folder and select Copy “Backup”.
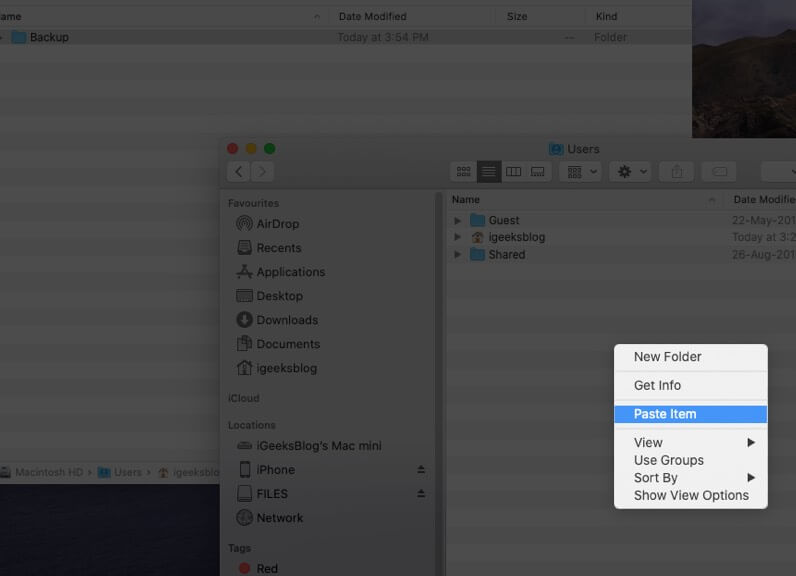
- Now, (open a second Finder window and) go to the location where you want your new iPhone backup folder. It can be the Desktop, Documents, a new folder somewhere. When you are at that location, right-click and select Paste Item. Let the process of copying the current Backup folder to this new location finish. Keep this Finder window open. You will need this in step 6 below.
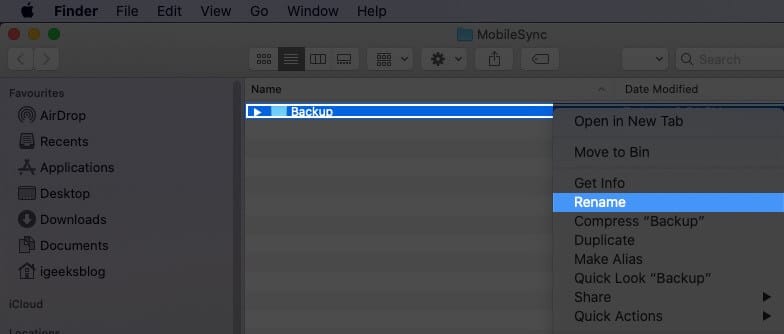
- After copying, go back to the first Finder window (~/Library/Application Support/MobileSync), right-click on the Backup folder, and choose Rename (or select the folder and press the enter key).
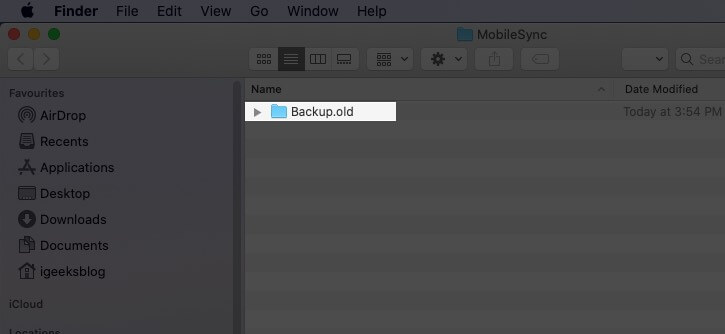
Now add .old to the file name. As a result, this folder name will look like Backup.old
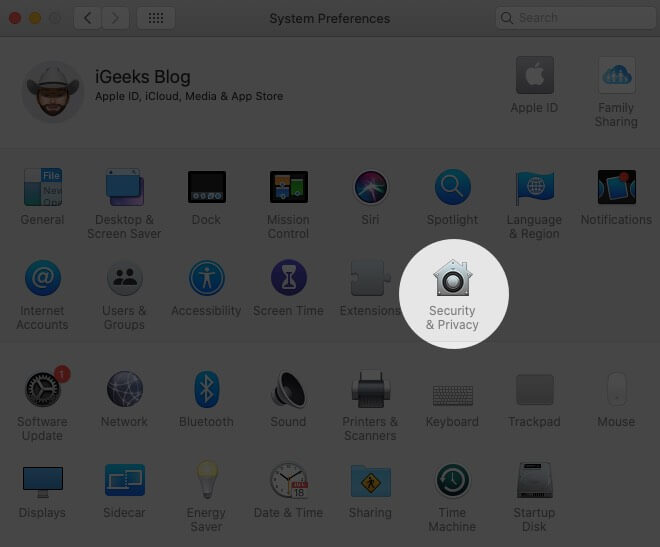
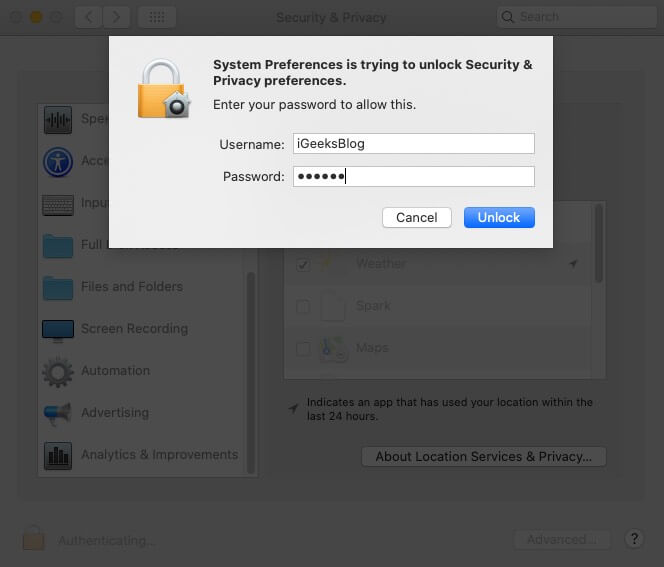
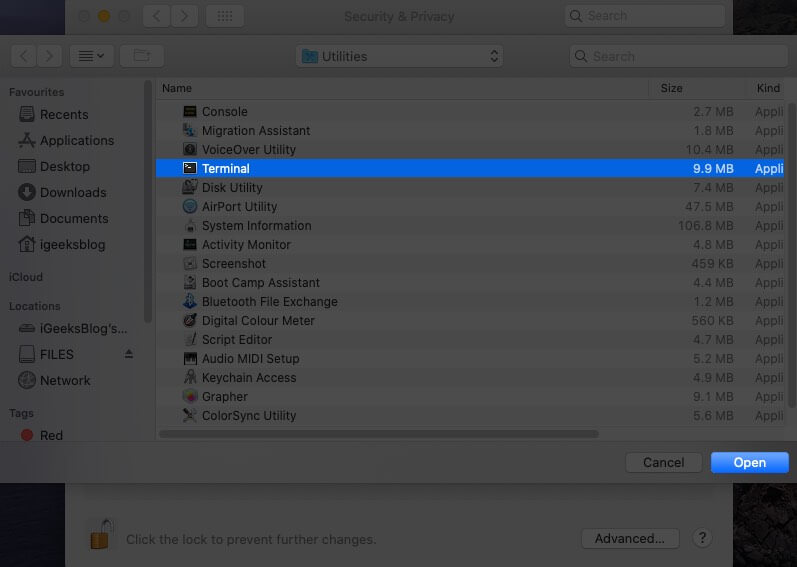
- From the top left, click on the Apple Logo → System Preferences → Security & Privacy → Privacy tab → click on the lock icon, and enter your Mac’s password to proceed.Now, from the left Sidebar, click on Full Disk Access → click on the tiny plus (+) icon. From the Application → Utilities folder → select Terminal and click Open. After this, you may click on the lock icon again and close this window.
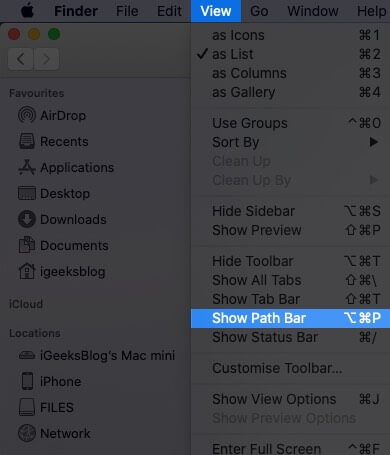
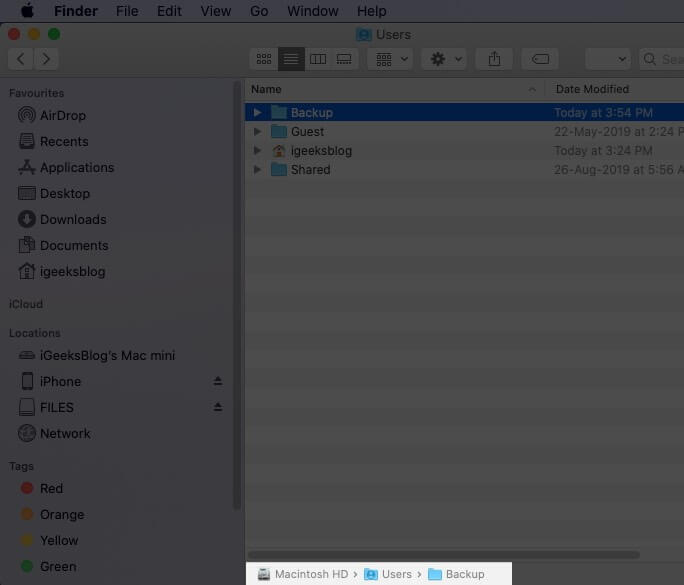
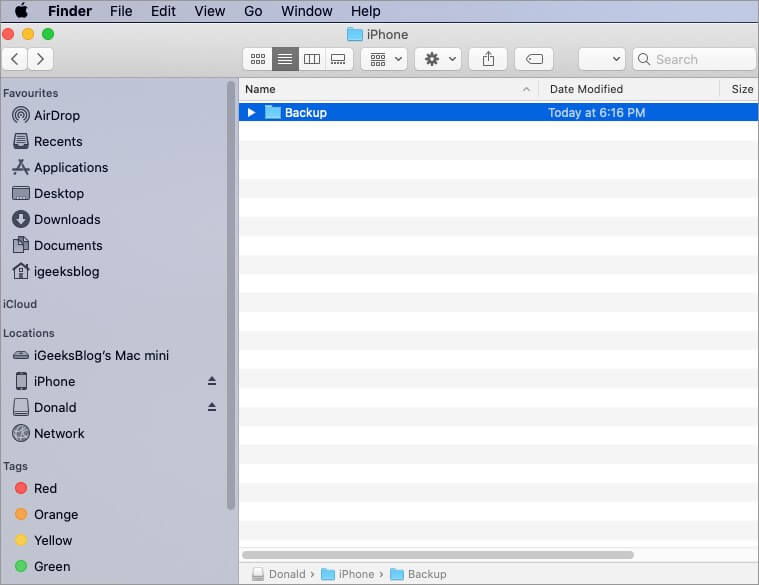
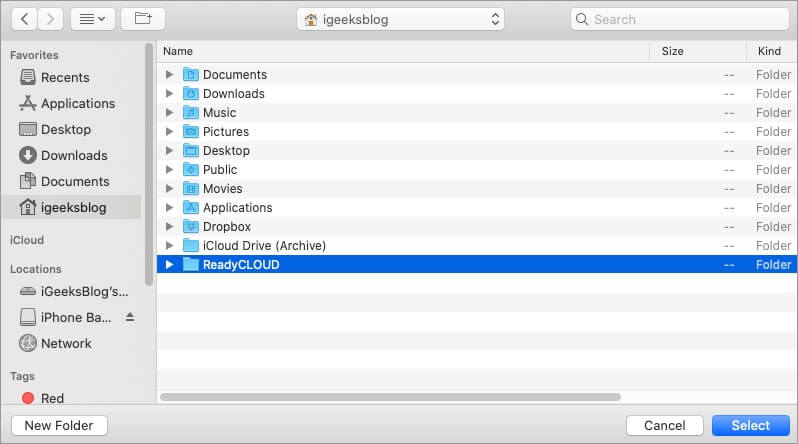
- Now, you have to know the exact location of the new Backup folder. For this, from the Finder window, click on View from the top bar, and choose Show Path Bar. You will see a thin row at the bottom that tells you the exact location of this new Backup folder. Keep this window open.
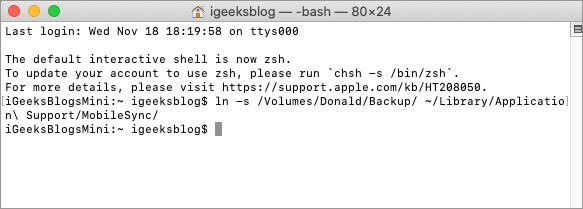
- Press Command + Spacebar, search for Terminal, and open it. Next, you have to edit the following command to suit your computer and then type/paste it in the Terminal window.
ln -s /Volumes/Drive/Backup/ ~/Library/Application\ Support/MobileSync/ - Very Important: Editing the above command: Open a plain notepad app or a site like editpad.org. Now, please copy the above command and paste it there. Next, you have to replace the /Volumes/Drive/Backup/ with the location of your Backup folder.
For example, see the screenshot above. The location of my Backup folder is Macintosh HD → Users → Backup. So the command will look like:ln -s /Volumes/Macintosh\ HD/Users/Backup/ ~/Library/Application\ Support/MobileSync/
If your new Backup folder is in an external pen drive named Donald, the command will look like:ln -s /Volumes/Donald/Backup/ ~/Library/Application\ Support/MobileSync/
ln -s /Volumes/Donald/iPhone/Backup/ ~/Library/Application\ Support/MobileSync/
- Copy the final command, paste it in the Terminal, and press the enter key.
Tip: Now, when you go to the original Backup.old Finder window, you will see a new folder named Backup, which will have a small arrow on it.
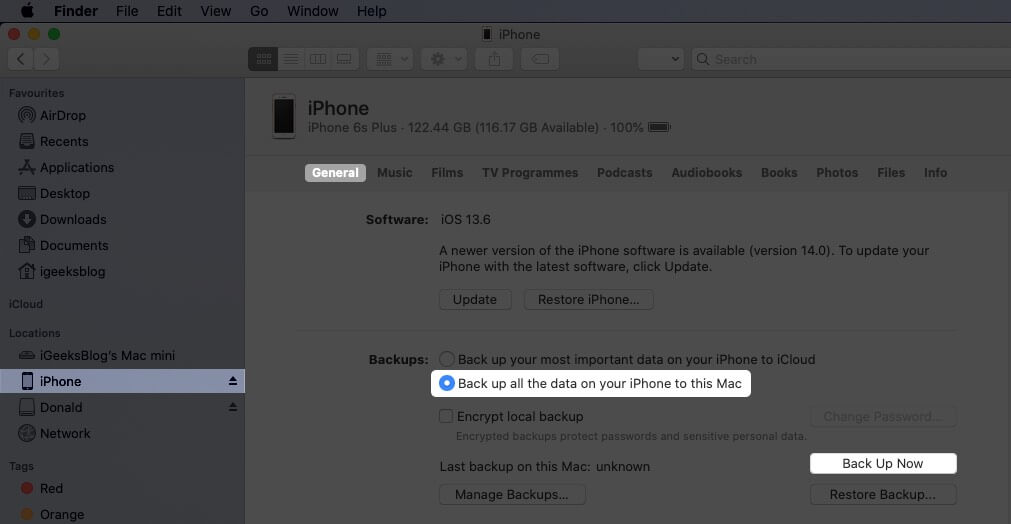
- Finally, open Finder on your Mac, connect the iPhone, Trust it, and click on Back Up Now. The backup would be made and saved at the new location.
Notes:
- Optional: After you complete the first backup at the new location, you may choose to delete the Backup.old folder. This may free significant space on your Mac.
- If you opted to back up your iPhone to an external drive, make sure you connect it to the Mac before hitting Back Up Now in the future.
Restore iPhone Backup Folder to its Original Location on Mac
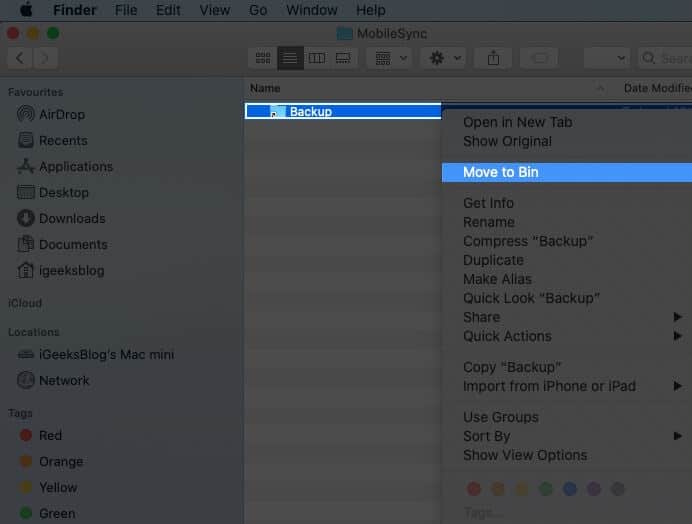
- From the Finder window, click on Go → Go to Folder → and enter this location ~/Library/Application Support/MobileSync
- Right-click on the folder with an arrow icon and select Move to Bin.
- Now, for safety, drag (or copy-paste) the current Backup folder to this location. All future iPhone backups will be saved here, like before. Even if you do not follow this step, the next time you make the device backup, a new folder named Backup will automatically be created.
Do you not want to follow the lengthy process above? Well, here is the most straightforward way to change the iTunes/Finder iPhone backup location on Mac.
How to Change iTunes Backup Location Using iPhone Backup Extractor
- Download iPhone Backup Extractor for free and complete the installation.
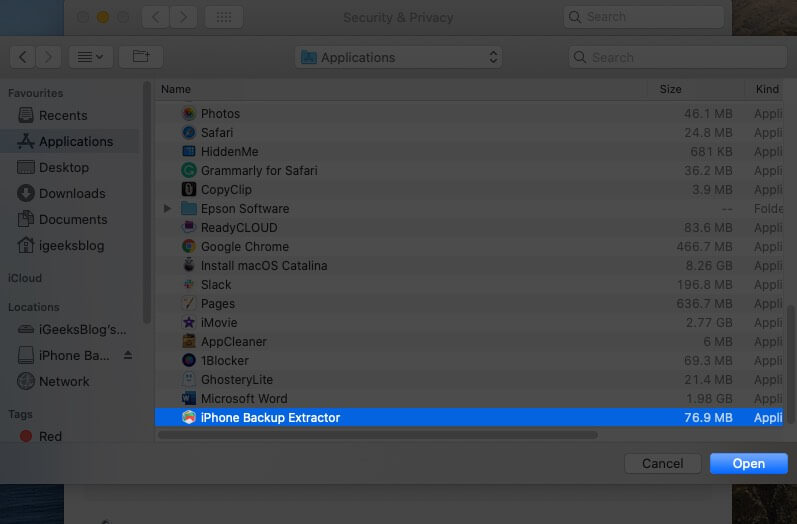
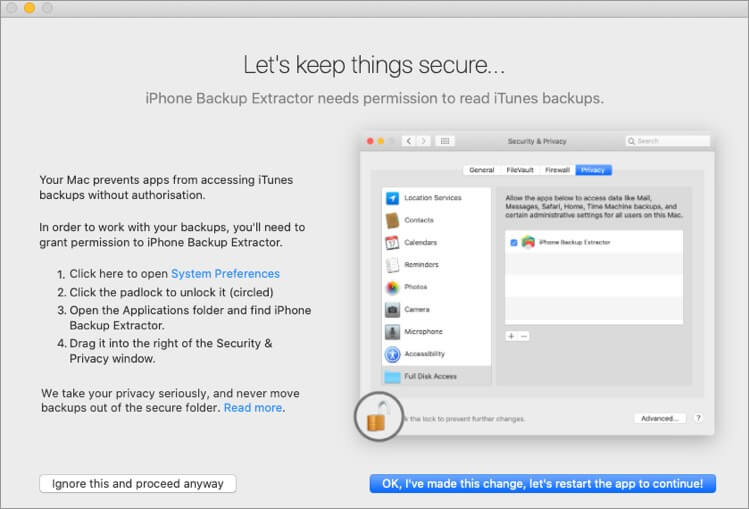
- Important: First time, you may have to open the System Preferences → Security & Privacy → Privacy tab → click on the padlock icon, and enter your Mac’s password. Now, click on Full Disk Access and then the plus sign (+). Next, select iPhone Backup Extractor and click Open.
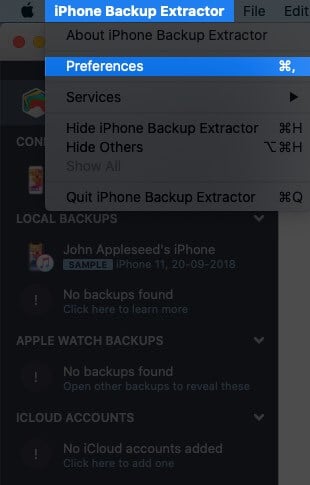
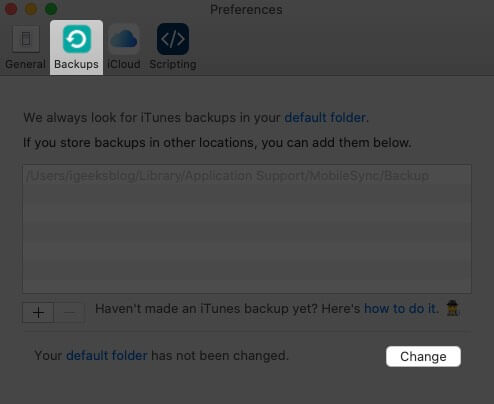
- Now come back to the iPhone Backup Extractor app window. (If needed, click on ‘OK, I’ve made this change, let’s restart the app to continue!’) From the top menu bar, click on iPhone Backup Extractor → Preferences → Backups → Change. Now, you may see a popup saying ‘Backup contains data.’ Click on ‘Open.’
- From here, drag the folder with a lengthy name like 149652….. to someplace else, like the Desktop.
- After that, inside the iPhone Backup Extractor app, click on Change and Select the desired folder.
Done! You have successfully changed the iPhone backup folder in just a few steps. To undo this change, click on Revert.
Already Changed iTunes Backup Location But Unable to See the Backup?
Even after you have correctly followed the above steps and are unable to find the backup, then we have a separate guide that has you covered.
Most of the time, if you follow the first manual step, the problem arises due to the wrong location address of the new Backup folder. You must get that right. If this is wrong, go to ~/Library/Application Support/MobileSync and you will see a white Backup symlink instead of a blue folder named Backup with an arrow.
How to Change the iTunes Backup Location on Windows PC
As iTunes won’t let you change it, you need to make way through a symbolic link. Also known as a symlink, it’s a bridge that connects two folders with the same name. Using a symlink, you can direct iTunes to back up data to a dummy folder that you’ll have to create. However, you’ll have to enter some commands in the “Run As Administrator” window. Just make sure that you create a dummy folder in a drive with enough storage space. Like, we created it in D:\. Let’s get started by creating a folder first.
- Create a folder named “MobileSync” in the D:\ (d stands for drive) on your computer.
- To view the by-default location, go to C:\Users\UserName\Apple\MobileSync if you have downloaded iTunes from Windows 10 Store. For the old desktop version, you need to go to C:\Users\UserName\AppData\Roaming\Apple Computer\MobileSync
- Cut and paste the Backup folder to the new MobileSync folder that you’ve created in D:\
- Now, run CMD as administrator. To do so, press Windows + R keys together, then type cmd in the search field.
- Press Ctrl + Shift + Enter to run it as in the administrator.
- Enter the command mentioned below.
If you’ve downloaded iTunes from the Microsoft store. MkLink /J “C:\Users\UserName\Apple\MobileSync\Backup” “D:\MobileSync\Backup
Enter this code MkLink /J “C:\Users\UserName\AppData\Roaming\Apple Computer\MobileSync\Backup” “D:\MobileSync\Backup” if using the older version.
Now when you back up your iPhone using iTunes, the data will be stored in the D:\MobileSync\Backup folder. Try backing up your iPhone and check if the Backup folder in the D:\ is configured correctly.
iPhone Backup Location Changed Successfully!
This is how you can have new iOS or iPadOS backups to a different location. Changing to some other folder on the same internal disk makes little sense. But doing the same on an external disk frees space on your internal disk.
I hope the above guide was helpful. In case you are facing difficulty at any step, feel free to reach us via the comments section below.
You may also like to read:
- Find iPhone Backup Location on Mac and Windows PC
- 3 Ways to Check Folder Size on Mac
- How to Use Control Center in macOS Big Sur
- How to Backup and Install iPhone Apps from Mac/Windows Without iTunes
I have been an Apple user for over seven years now. At iGeeksBlog, I love creating how-tos and troubleshooting guides that help people do more with their iPhone, iPad, Mac, AirPods, and Apple Watch. In my free time, I like to watch stand up comedy videos, tech documentaries, news debates, and political speeches.
 Now add .old to the file name. As a result, this folder name will look like Backup.old
 Tip: Now, when you go to the original Backup.old Finder window, you will see a new folder named Backup, which will have a small arrow on it.
Thanks for the help, it has been very useful.
Excellent post. I certainly love this website. Keep it up!
Hello but my issue is slightly different – we have old back on the Windows machine but something happened with iTunes – we had to reinstall it as it did not work on that PC anymore – now the old back is there but there is no way to restore the new iphone from it… so how do we do that? We do not need to move backup folder to a new location – we just need to restore it from the old location which the itunes does not use now, thnks, J.
Hello, There are two fixes I can off you:
Fix 1- Make a new backup from the freshly installed iTunes and check the location where the new backup is stored. Now place the old file backup here; if all goes well, iTunes should recognize and give you the option to recover that backup.
Fix 2- If, by chance, iTunes isn’t able to fetch the old backup file, then rename the old file as the latest backup file, sort of fooling iTunes. (This one doesn’t work 100% of the time)